Sunday, March 1, 2009

How to Create Your Own Silk Flower Arrangements

Looking for a floral arrangement to spruce up your room, but don't want to spend a lot of money? Make it yourself! You can often find silk flowers on clearance or at discount stores. Sometimes you have to be patient and wait for the sale or look for coupons. I found several really nice silk tree branches on clearance. I bought them with no particular plan in mind, but they were really nice quality and the price was right. I ended up making two arrangements.


The first one I created in a floor vase (on clearance of course). It had a few dings, but nothing that couldn't be hidden with a little touch-up paint. I put floral foam inside the vase and using floral pins covered it with moss. Then I placed each branch into the foam.


The second one is smaller and for a table top or shelf. I started with a large styrofoam ball. Then I cut the leaves and flowers off the branches, placing each individual stem into the ball until entirely covered. To display, I placed the ball on top of an inexpensive metal container.


Wednesday, February 18, 2009

Make Your Own Wallpaper Border

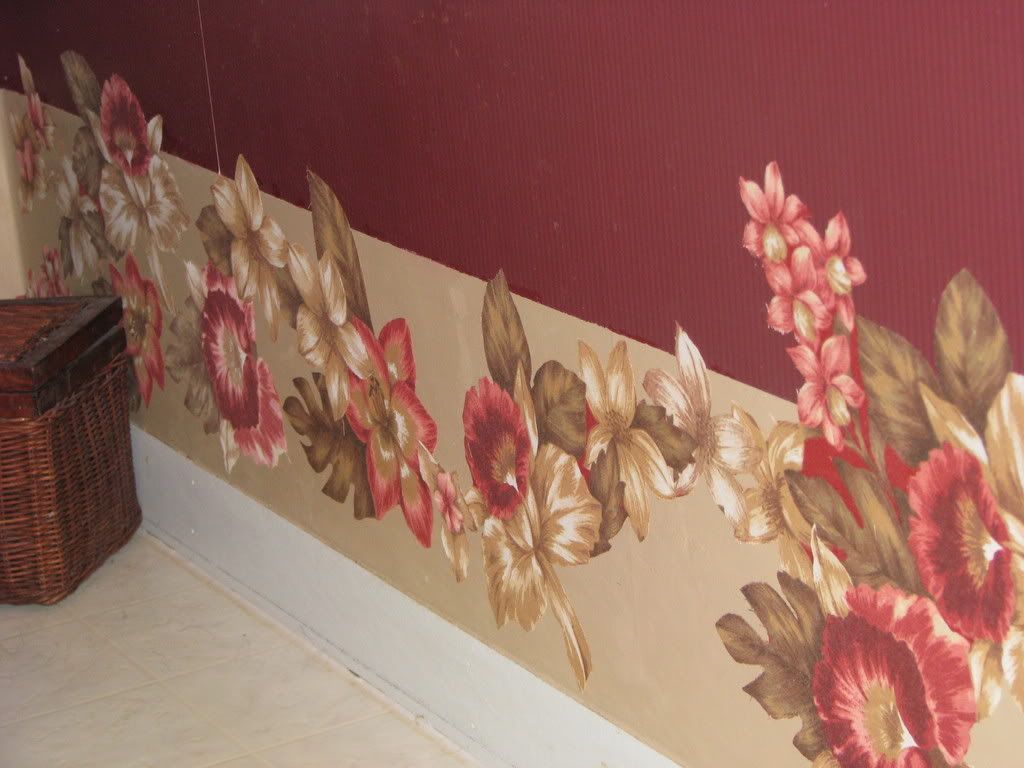
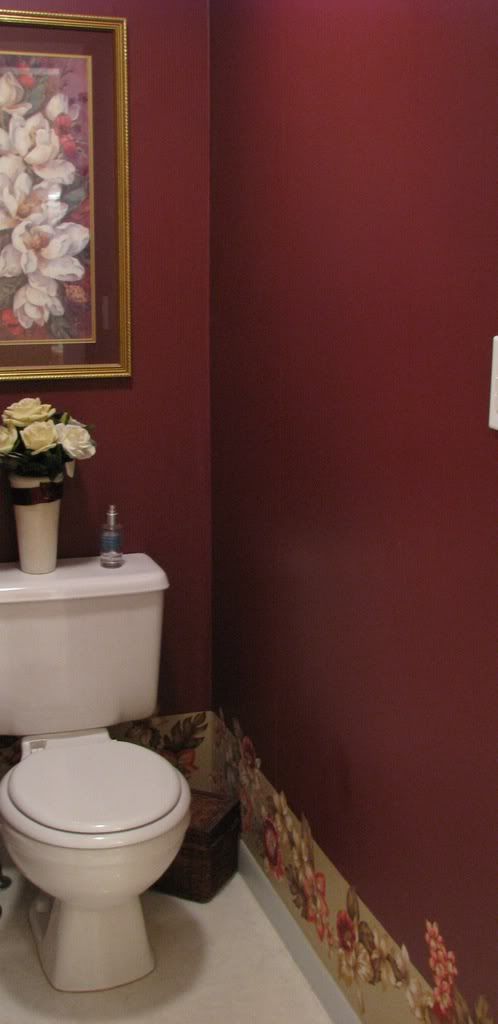
What to do with an existing wallpaper border that you don't like? Paint it! Painting borders needs to be well planned. Make sure to put tape around the edges of the border, and make sure it's painter's tape. Many have fallen victim to pulled up paint chips by using scotch tape as a substitute. Does this really work? Yep, I tried it and it worked wonderfully. Our master bathroom has a separate, very small toilet room. The actual wallpaper was o.k. and matched the decor I wanted. BUT, the border was not to my liking. I wanted to save the wallpaper, but ditch the border. There was no way to peel off the border without ruining the wallpaper. So, I carefully taped off the edges of the border and painted right over it. It worked very well. Then, I took extra fabric left from making the bedroom curtains, and cut out the floral designs. I admit this part was a little time consuming (gives you something to do while watching TV). Using liquid starch, I covered each fabric cutout and "pasted" it onto the dried painted border. Now I have a coordinated master bedroom and bathroom, without spending a lot of money. The best part is if I get tired of my new floral border, I can peel it right off without harming the paper underneath and use something else. Below are photos of the matching comforter and curtains -- close up of the border -- and a full length room view.


Thursday, January 29, 2009

Leaves x 6 Wall Art


Grouping like things together makes a bigger statement then just hanging one small frame by itself. I used 4x4 stretched canvas frames to make this collection showcasing different kinds of leaves. This is a fairly easy project. The hardest part is hanging them evenly!
Instructions:
1. Paint six 4x4 stretched art canvases with brown textured paint and set aside to dry.
2. Tear handmade white paper (or something that is heavily textured) to fit each frame.
3. Using 6 different types of dried or silk leaves, affix one to each of the white papers.
4. Finish off with various types of buttons, yarn, raffia, and beads.
5. Glue finished collage to center of canvas frame.

Tuesday, January 27, 2009

More Uses for Scrapbook Supplies

Do you have leftover scrapbook supplies that you'll probably never use? I know I do! Don't throw the items away or let them take up all the room in your supplies folder, use them to decorate other parts of the house.

Here's an example of what I did with a few leftover supplies:

BEFORE PHOTO

I found this wall plaque at a discount store.

The middle is a cermaic plaque that slides out of the frame and came with a printed leaf on it.

I took the cermaic plaque out and glued layers of torn handmade paper to it and, to finish it off, placed a skelton leaf in the middle.


AFTER PHOTO


What can you do with your leftover scrapbook supplies? Here are 12 ideas to get you started:
1. Make handmade cards.
2. Add dimensional texture to your scrapbook borders by layering.
3. Make matchbooks out of your scraps.
4. Use the scraps to frame smaller photos.
5. Use as photo corners.
6. Make gift tags.
7. Make homemade envelopes.
8. Piece together a paper crazy quilt. Adhere your scrap down to your
album page to mke a crazy quilt background. Use your pens to make
fun or fancy 'stitches.'
9. Exchange supplies on a craft forum.
10. Make a mini album.
11. Make fridge magnets. View examples here.
12. Tear up or shred as a gift bag filler.

Sunday, December 14, 2008

Alternative Uses for Scrapbook Paper

Scrapbook paper can be used in a variety of ways -- other than scrapbooking. Think outside the box! There are many different textures and patterns of paper that make terrific collages for wall art. Here are a couple of examples of collages I have made.


I purchased a 10x10 artist stretched canvas and painted it black. Then I layered and glued different textures and sizes of scrapbooking papers.


Across the bottom, I pierced two holes on each side with a sewing needle and threaded a wired string of orange beads.


Paper is from Paper Pizzaz.


When I saw this frame I thought it was perfect for a paper collage. The papers are sandwiched between two pieces of glass, which makes them appear to "float."

I crumbled the paper and then smoothed it back out for a textured look. Paper is from Paper Pizzaz. Other elements are Rebecca Sower's Fresh Cuts - Keys to the Past.


Saturday, December 13, 2008

Iris Folding Cards

A couple more cards using the iris folding technique. The template and papers are from the Anna Griffin kit.


Thursday, December 11, 2008

How to Create a Sunflower Centerpiece


November was my parents 47th wedding anniversary! We planned a very nice family dinner at home for them. I created a fresh flower centerpiece to brighten the table. I re-used a square glass container (I think it had cashews in it before) and placed river rocks in the bottom. I filled the vase about half full with water and emptied the packet of flower perserver that came with the bouquet. This stuff really works -- the flowers lasted over a week before they started to wilt.

I picked up a fresh flower bouquet for $15 at Sam's Club. Starting with the most prominent flowers first (the sunflowers) I cut them to size and placed in the container. I use kitchen shears and cut the steams at an angle. Remember to remove any leaves that will lie below the level of the water in the vase as this will help to keep the flowers fresh. Next, I cut the filler flowers at shorter lengths and placed in the container. Since this arrangement was a centerpiece and viewed from all sides, the flowers must be placed all around at different angles for the best look. For a finishing touch I added some lengths of grapevine and leaves I had on hand from another floral arrangement.