Showing posts with label Home Decor. Show all posts

Sunday, March 15, 2009

Dried Floral Arrangements

There are several ways to preserve fresh flowers for years without a great deal of work or expense. The easiest and least expensive method is air-drying. This is a wonderful way to preserve those special flowers received as a gift or flowers from your own garden.

Fasten small bunches of fresh flowers together with a rubber band near the cut end of the flowers. Don't use string or wire, as the stems will shrink as they dry, and may fall out of their tie on to the floor. Hang the bundled flowers from a hook or hanger upside down in a clean, dry place out of direct sunlight, such as a closet.

Let the flowers air dry for two to four weeks. When the flowers are ready, they will be dry and crisp to the touch.

Once dry, spray with clear hair spray to preserve the color and stop the petals from dropping.

So now that the flowers are dried, what do you do with them? You can
make a wreath or a dried flower arrangement, perhaps hang your dried roses in a window, make a photo frame box, glue dried petals or buds to letters or menus, or use dried petals in a potpourri.

I dried my wedding anniversary roses and made this arrangement. Everytime I see it, I'm reminded of the special memories of that day.

Sunday, March 1, 2009

How to Create Your Own Silk Flower Arrangements

Looking for a floral arrangement to spruce up your room, but don't want to spend a lot of money? Make it yourself! You can often find silk flowers on clearance or at discount stores. Sometimes you have to be patient and wait for the sale or look for coupons. I found several really nice silk tree branches on clearance. I bought them with no particular plan in mind, but they were really nice quality and the price was right. I ended up making two arrangements.


The first one I created in a floor vase (on clearance of course). It had a few dings, but nothing that couldn't be hidden with a little touch-up paint. I put floral foam inside the vase and using floral pins covered it with moss. Then I placed each branch into the foam.


The second one is smaller and for a table top or shelf. I started with a large styrofoam ball. Then I cut the leaves and flowers off the branches, placing each individual stem into the ball until entirely covered. To display, I placed the ball on top of an inexpensive metal container.


Wednesday, February 18, 2009

Make Your Own Wallpaper Border

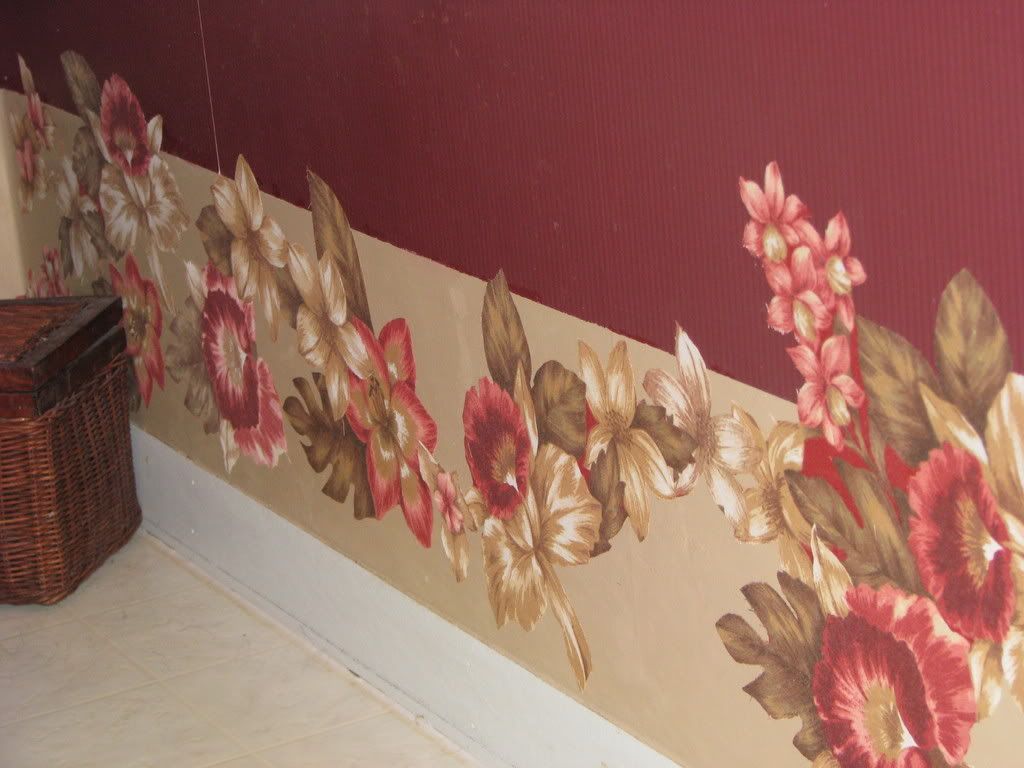
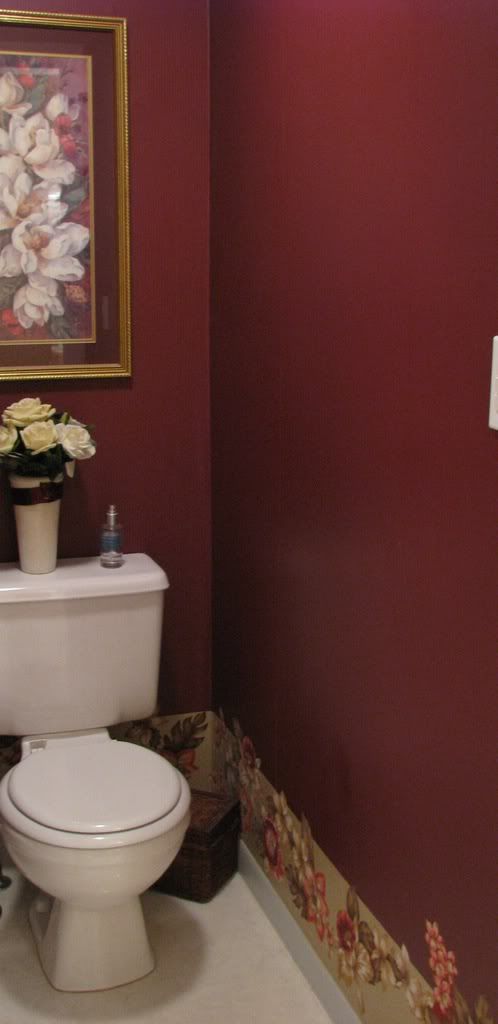
What to do with an existing wallpaper border that you don't like? Paint it! Painting borders needs to be well planned. Make sure to put tape around the edges of the border, and make sure it's painter's tape. Many have fallen victim to pulled up paint chips by using scotch tape as a substitute. Does this really work? Yep, I tried it and it worked wonderfully. Our master bathroom has a separate, very small toilet room. The actual wallpaper was o.k. and matched the decor I wanted. BUT, the border was not to my liking. I wanted to save the wallpaper, but ditch the border. There was no way to peel off the border without ruining the wallpaper. So, I carefully taped off the edges of the border and painted right over it. It worked very well. Then, I took extra fabric left from making the bedroom curtains, and cut out the floral designs. I admit this part was a little time consuming (gives you something to do while watching TV). Using liquid starch, I covered each fabric cutout and "pasted" it onto the dried painted border. Now I have a coordinated master bedroom and bathroom, without spending a lot of money. The best part is if I get tired of my new floral border, I can peel it right off without harming the paper underneath and use something else. Below are photos of the matching comforter and curtains -- close up of the border -- and a full length room view.


Thursday, January 29, 2009

Leaves x 6 Wall Art


Grouping like things together makes a bigger statement then just hanging one small frame by itself. I used 4x4 stretched canvas frames to make this collection showcasing different kinds of leaves. This is a fairly easy project. The hardest part is hanging them evenly!
Instructions:
1. Paint six 4x4 stretched art canvases with brown textured paint and set aside to dry.
2. Tear handmade white paper (or something that is heavily textured) to fit each frame.
3. Using 6 different types of dried or silk leaves, affix one to each of the white papers.
4. Finish off with various types of buttons, yarn, raffia, and beads.
5. Glue finished collage to center of canvas frame.

Wednesday, October 1, 2008

Window Treatments

Choosing window treatments can be daunting. This is one area that I do pay a little extra to get good quality fabric. Fabrics soften a space, and the right look will enhance your room's decor. It is usually best to use decorator fabrics as opposed to fashion fabrics. Decorator fabrics have different features which lend themselves better to drapery. Decorator fabrics are more durable, drape better and most have had a finish added to increase stain, crease, mildew, and fade resiliency.

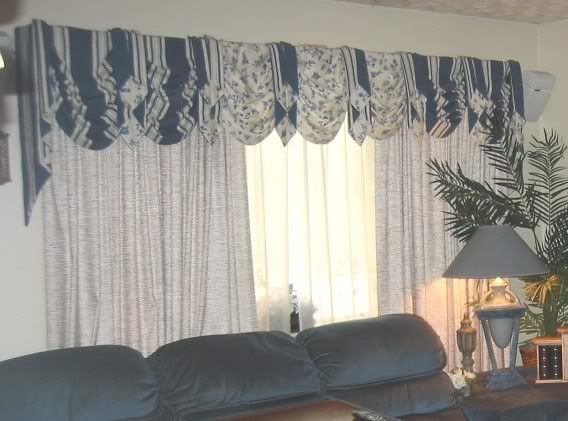
But it is easier than you think to get a custom look at a bargain price. I wait for the 50% off coupons for JoAnn Fabrics and then go shopping. These are photos of different window treatments I have sewn for our home.


Living Room. The panel curtains came with the house when we bought it and were lined. They were a little plain but good quality. Using Simplicity pattern #8803 I made the swags and jabots in coordinating fabrics to match the panels. They are attached (I stapled them) on a mounting board and attached the board to the wall over the current curtain rod system. These were definitely the most difficult window treatments I have made and took several days to finish. I kind of promised myself never to do these again :).


The Dining Room is visible from the Living Room, so I made a matching swag topper here too. The plain panels were not wide enough for the window, so I added 2 coordinating print panels.


Using Simplicity pattern #7204 I made these for the Office. The big saving here was the material I used were the curtain panels that came with the house for this room. I just repurposed them! I added two plain panels as accents.


I used Simplicity pattern #8894 for these. When I chose the wallpaper and border for this room, matching fabric was also available. I purchased only 1 yard because it was REALLY expensive. It was just enough to make the fabric triangles. Each triangle has a tassel attached at the bottom. The triangles were attached to the curtain rod with metal curtain rings that have clips.


These are the curtains I made to match our bedroom set. Pre-made floral curtain panels were available to match the comforter. I thought that much of the pattern was overwhelming. So I cut the bottom off the purchased panels and sewed brown suede fabric onto them.


I found a really good deal on these curtains, but they were too short. I liked the large grommets at the top, so I found coordinating fabric and sewed it to the bottom of the panels. My own custom look!